Aspire Budgeting

Build your first budget in 15 minutes

This page walks you through every step. By the end, you'll have a working budget with real money assigned, real categories tracking spending, and your first transaction logged.

5 steps · ~15 minutes · No experience needed

Before you begin

Grab these two things so you can move through setup without stopping:

Your bank balances

Open your bank app and note the current balance of each account you want to budget (checking, savings, credit cards).

A rough list of monthly expenses

Rent, utilities, groceries, subscriptions — the recurring costs you know about. Exact amounts aren't required. Estimates are fine.

1

Copy the Aspire spreadsheet

Click the button below to copy the Aspire Budget template to your Google Drive. This is your personal copy — only you can see or edit it.

Copy the free spreadsheet

You'll be asked to sign in to Google if you aren't already. The copy appears in your Drive immediately.

The Copy spreadsheet dialog in Google Sheets
2

Add your accounts and starting balances

Open the Configuration tab in your new spreadsheet. You'll see a section for accounts. Add each account you want to budget.

Accounts to add:

  • Checking account — your everyday spending account
  • Savings account — if you have one
  • Credit card — if you carry a balance

Start simple. You can always add more accounts later. If you have five bank accounts, pick the 2–3 you actually spend from daily.

The Configuration tab with accounts added

Now go to the Transactions tab. For each account you just added, enter a "Starting Balance" transaction. This tells Aspire how much money is in each account right now.

For each account, enter a row with:

  • Date — today's date
  • Inflow — the current balance of the account (use Outflow for credit card debt)
  • Account — the account name you added in Configuration
  • Memo — "Starting Balance"
Transactions tab with Starting Balance entries for each account

After this step: Your Dashboard will show a total "Available to Budget" amount — this is the sum of all your starting balances. That number is the money you're about to give jobs to.

Carrying credit card debt?

If you're not in the habit of paying your credit card in full each month, don't add it as an account. Instead, create a budget category for the payment (e.g. "Visa Payment") and fund it monthly like any other bill. This keeps your Available to Budget positive and your budget focused on the money you actually have to work with.

Once the debt is paid off and you're paying the card in full each month, add it as an account and budget normally.

We strongly encourage not adding to credit card debt while paying it down. Learn more about credit cards in Aspire →

3

Review your categories

The spreadsheet comes with a set of default categories already filled in on the Configuration tab. Categories are the "envelopes" your money goes into — each one represents something you spend on or save for.

Look through the defaults and make them yours. Delete categories that don't apply to your life, rename ones that are close but not quite right, and add any that are missing. You can change these at any time — nothing is permanent.

Tips for getting started:

  • Fewer is better at first — 8–12 categories is plenty
  • Name them in language you actually use ("Eating out" vs "Food & Beverage")
  • It's okay to leave the defaults and tweak later once you see how you spend
Default categories and Monthly Amounts on the Configuration tab

Set your Monthly Amounts

Each category has a Monthly Amount column — this is how much you plan to put into that envelope each month. The spreadsheet prefills some defaults, but take a minute to adjust them to your actual life.

Don't stress about getting these perfect. Use your best guess for now — you'll refine them after your first month of real spending data. The Category Transfers tab uses these values to tell you exactly how much each category still needs, so setting them now makes Step 4 much faster.

Quick guidelines:

  • Bills (rent, utilities, insurance): use the exact amount
  • Variable spending (groceries, dining): estimate based on recent months
  • Savings goals: whatever you can consistently set aside, even if it's small
4

Assign every dollar a job

Check the Dashboard tab. You'll see your "Available to Budget" number — this is the sum of all your starting balances that hasn't been assigned to a category yet. Your goal is to get this to $0.

This is the core of Aspire:

Assigning money isn't spending it. You're deciding in advance where each dollar will go. When Available to Budget hits $0, every dollar has a plan. That's the "win" moment.

Go to the Category Transfers tab. This is where you move money into your categories. For each category, add a row with the amount you want to set aside:

  • Rent: the exact amount due
  • Groceries: your best estimate for the month
  • Entertainment: whatever you're comfortable spending
  • Emergency fund: even $25 counts

Don't worry about being perfect. You can move money between categories at any time using this same tab. The point is to make a first pass — a starting plan — not a permanent commitment.

Category Transfers tab with money being assigned to categories

After this step: Available to Budget shows $0 and every category has a balance. Your budget is working.

5

Enter your first transaction

Open your bank app. What was your last purchase? Enter it now.

Important: Only log transactions that happen after your starting balance. Your starting balance already accounts for everything before it. If you log an older purchase, you'll double-count it and your balances will be wrong.

Go to the Transactions tab and add a row with:

  • Date — when the purchase happened
  • Outflow — how much you spent
  • Category — which envelope it comes from
  • Account — which bank account you paid with
  • Memo — a short note (e.g. "Costco groceries")

After entering the transaction, go back to your Dashboard. You'll see the category balance decreased by the amount you spent. The budget is tracking your spending in real time.

Transactions tab with one entry filled in Dashboard showing the category balance decreased after the transaction

Your budget is set up and working

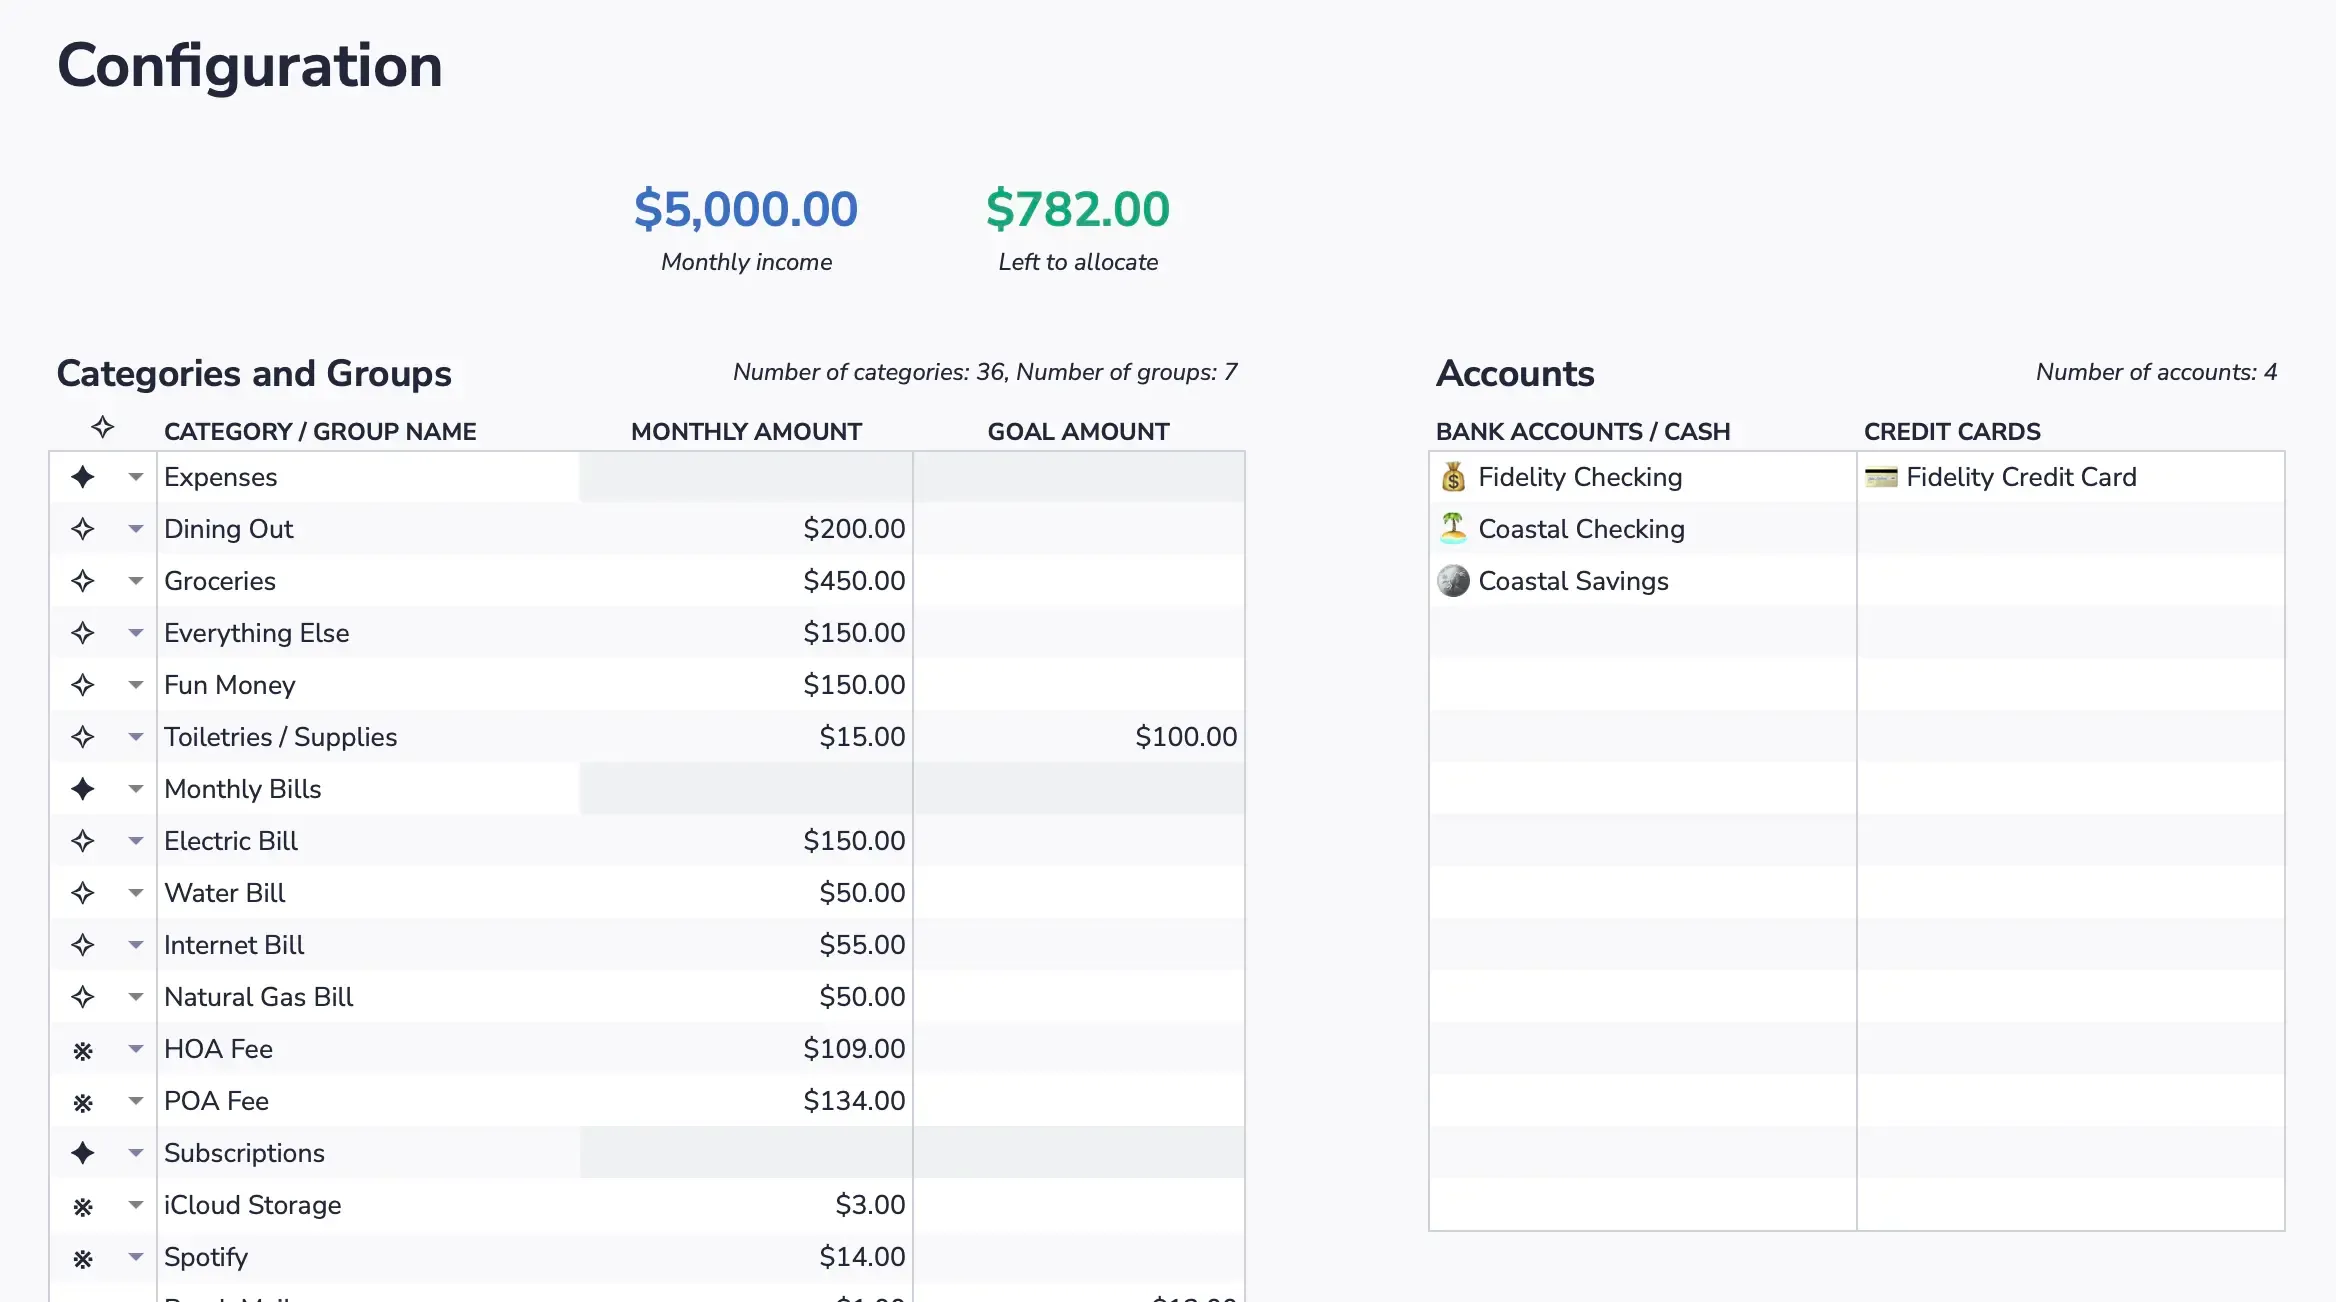
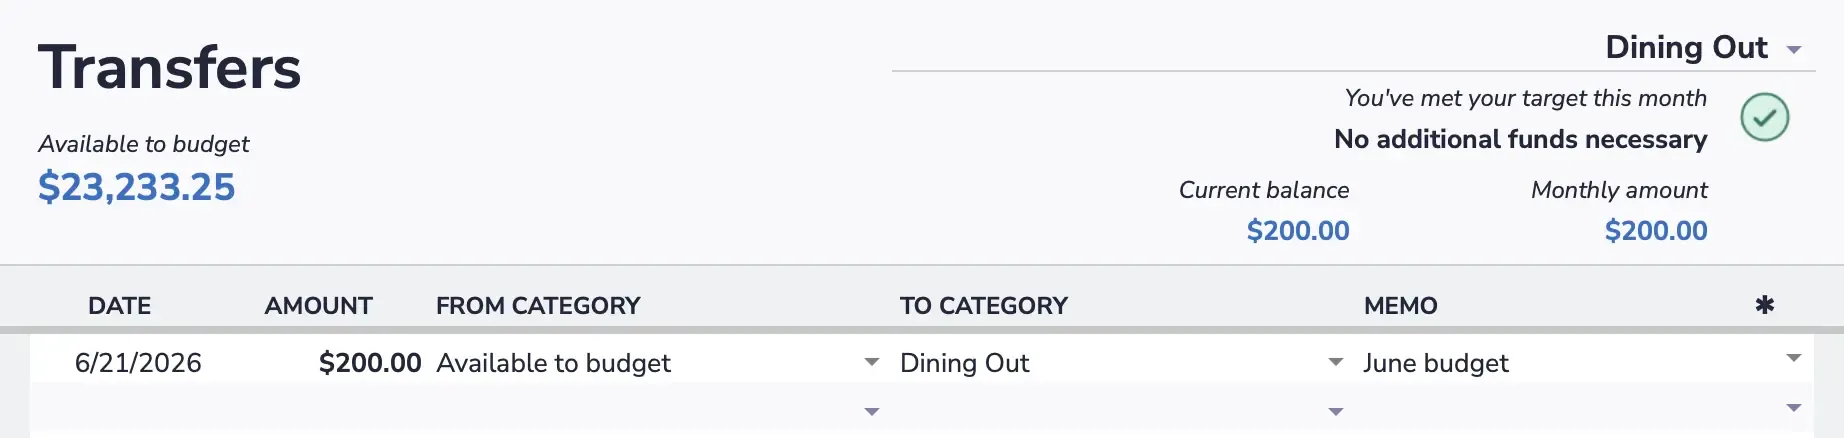
You've entered real balances, created categories, assigned every dollar, and logged a transaction. The budget is now tracking your money. That's it — you're budgeting.

Your only job this week:

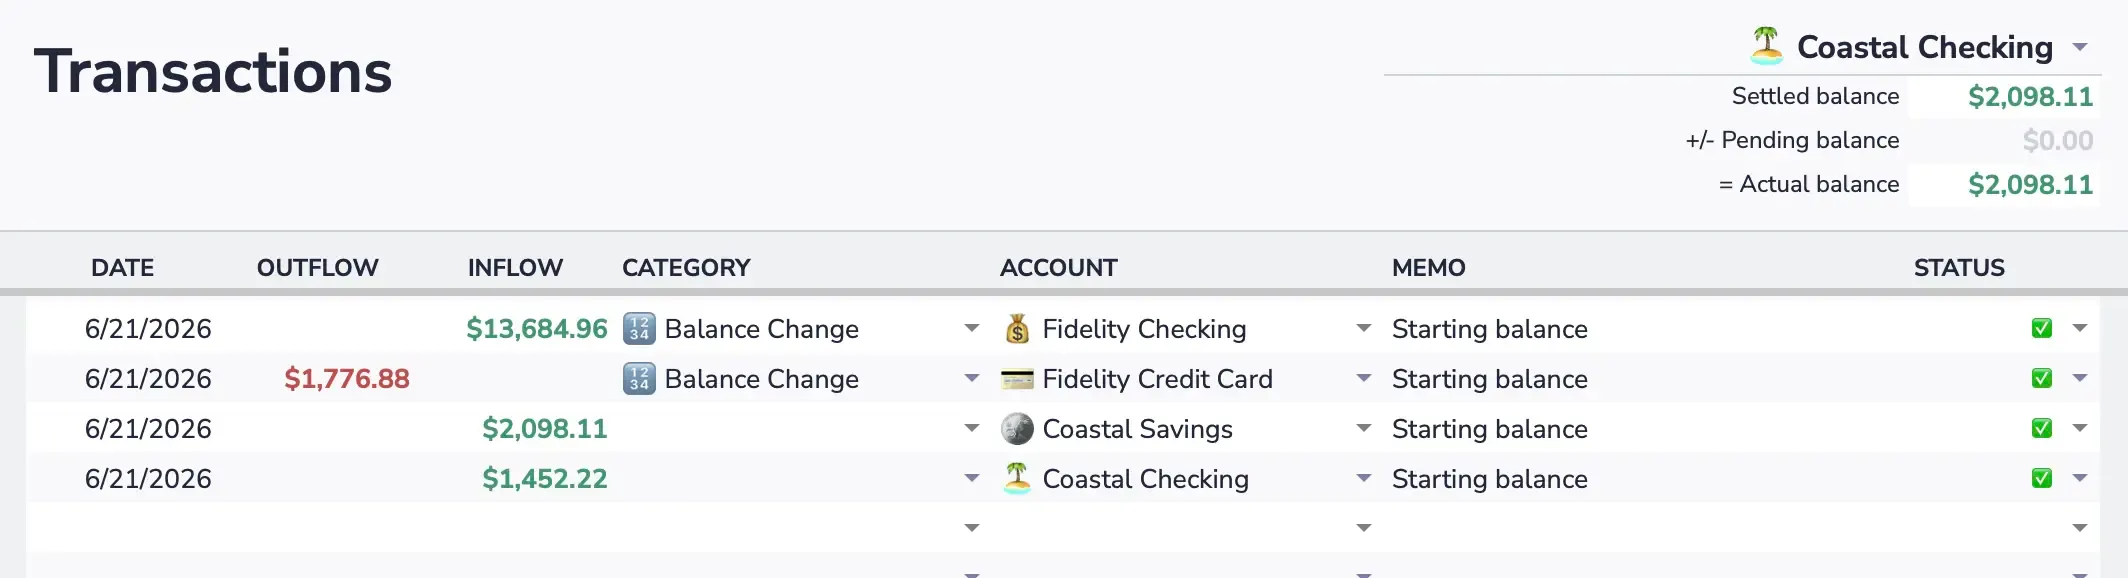
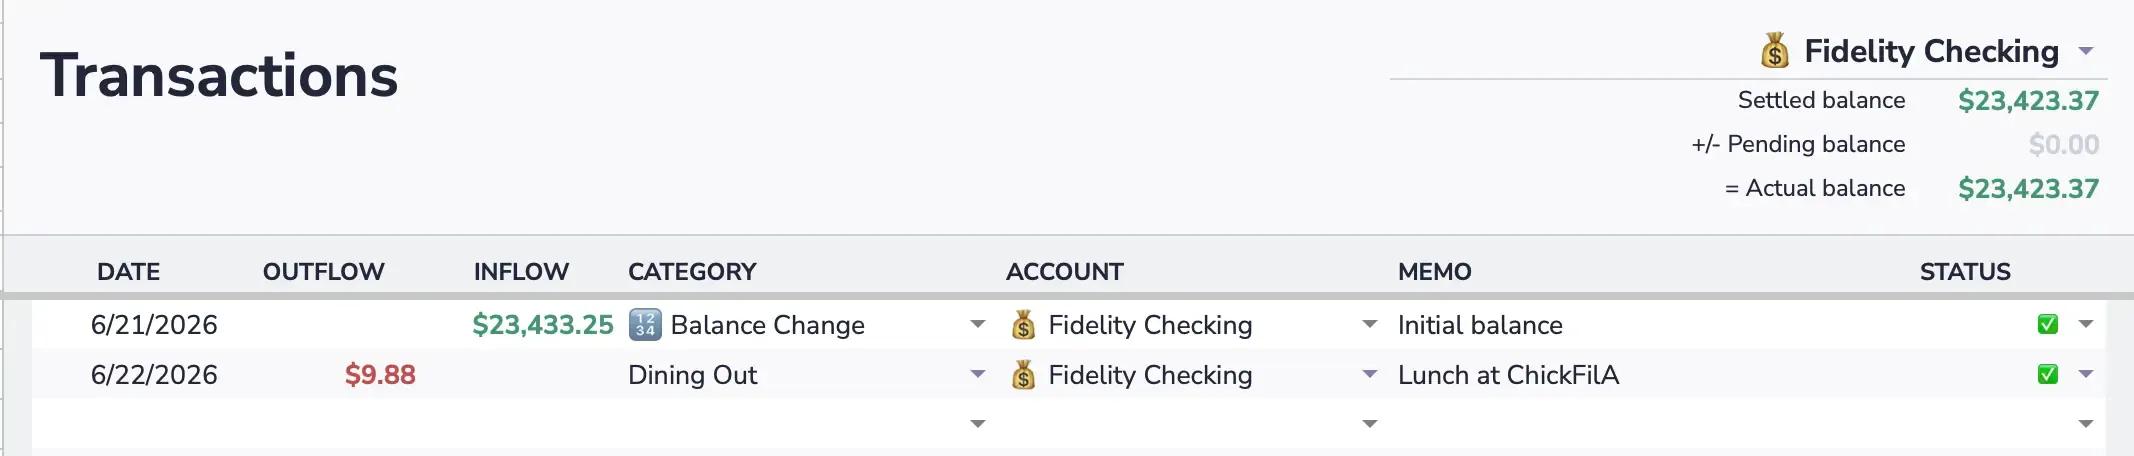
Each time you spend money, add it to the Transactions tab. That's one row — takes about 15 seconds. Do this daily (or every couple days) and your budget stays accurate without any extra work.

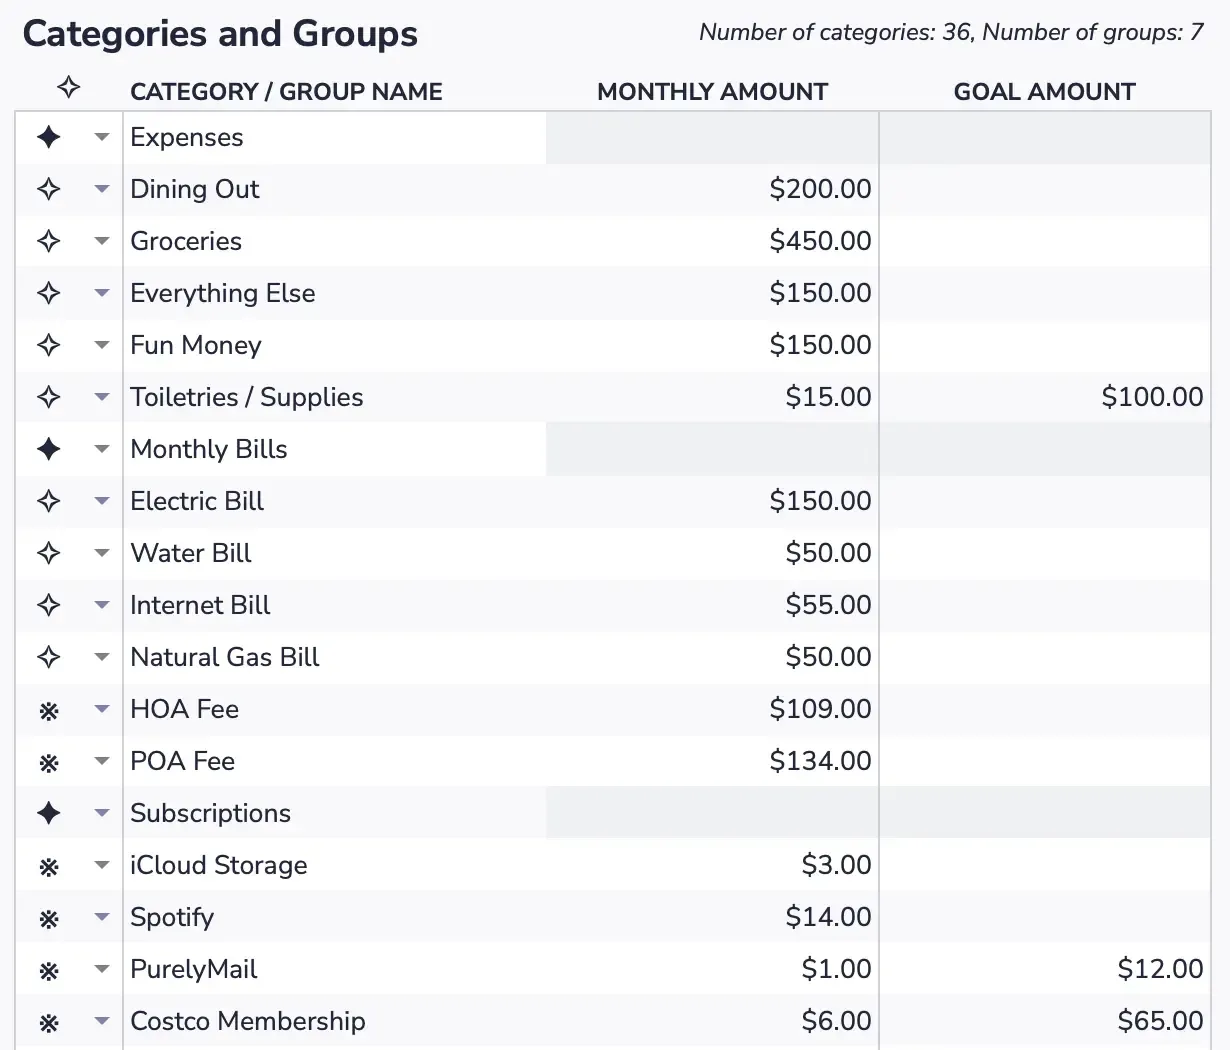
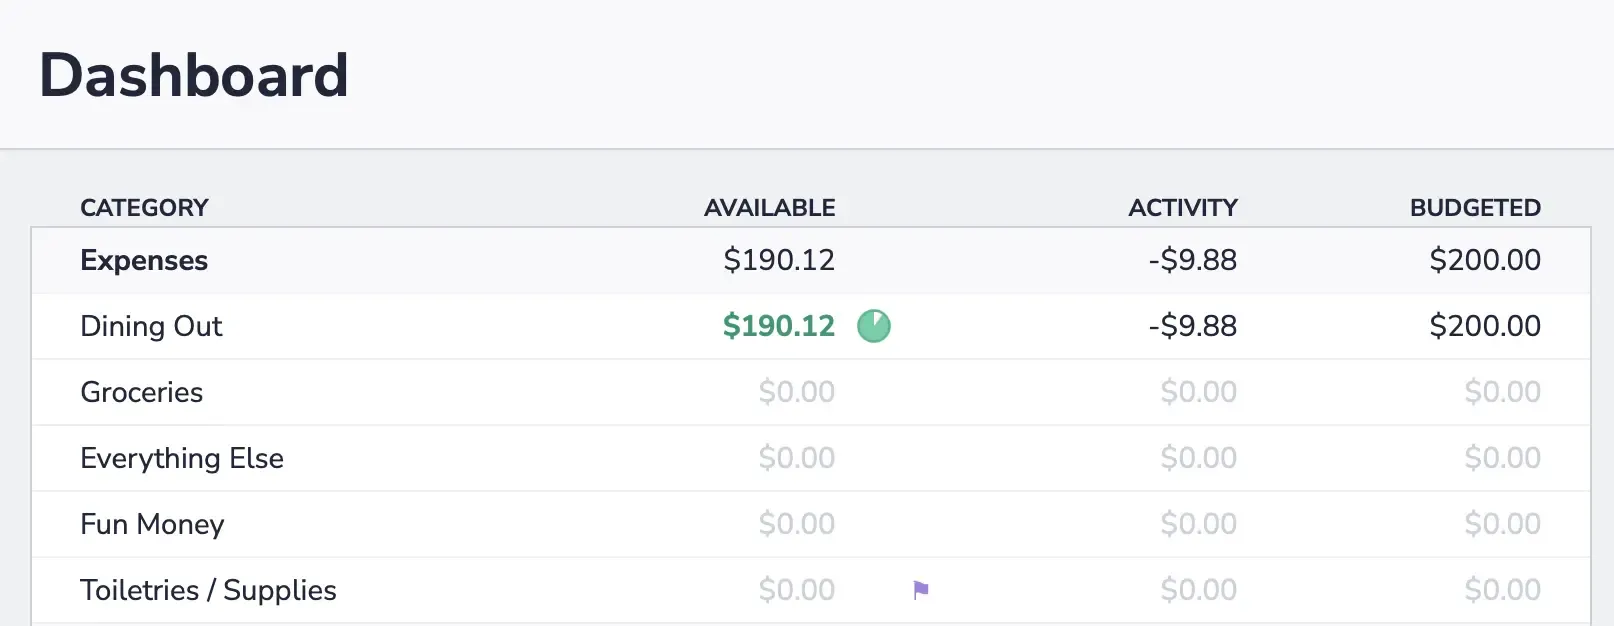
After a week of logging transactions, you'll have a clear picture of where your money goes — and your category balances will tell you exactly what's left to spend.

Install the Aspire add-on

The free Aspire Budgeting add-on gives you a sidebar inside your spreadsheet with:

  • Spending Reports and Trend Reports
  • Transaction sorting and organization
  • Faster transaction entry and account transfers

The add-on also offers Aspire Turbo — premium features like CSV import, auto-categorization, and budget forecasting designed to speed up your workflow and get more insights from your budget.

Get the free add-on